
Part I
What is in for you?
The ListView control in XAML (<ListView>) is a great control to easily display elements in a list (let’s talk about its – I’d say even more powerful – sibling GridView in part II of the how to). Especially programmers who are used to select MFC for the UI can tell how hard it is to realize an individual styling for rows in a list control. Or even more challenging for the rows individually, depending on the content to be displayed. Using WinUI3 it is fairly easy to create the styling in XAML: you provide a template for an entry in a row and WinUI will do the rest.
This “How to” is split into two parts: in the first part I’d like to explain the basics how to make a list using the <ListView> control. In the second part we will extend the “How to” and add individual row design based on the type of the content to be displayed in a row.
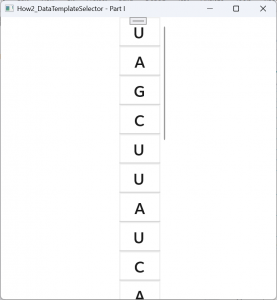
What we will reach within this How To:
You should be familiar with WinUI and how to create an app, as well as how to use auto generated code (from the MIDL compiler), etc. I will not discuss these steps in detail. For styling purposes, I use the WinUI Gallery.
I will use Visual Studio 2022 and C++ (version 17). By the time I write this how to, Microsoft is up to the (stable) Version 1.7250606001 of the WindowsAppSDK. I am using Windows 11.
You will find the code in my GitHub repositories: https://github.com/AgentSmith-Dev/How2-WinUI
An example from Biochemistry: display an RNA sequence
RNA (ribonucleic acid) is the name of a set of large molecules which play an essential role in in a lot of biological functions, mainly in the cell of plants, animals and human beings. Each RNA consists of four different types of molecules, called “nucleotides”: Adenosine (A), Cytosine (C), Guanine (G), Uracil (U). The sequence of these nucleotides is crucial for the functionality of the RNA.
Learn more about RNA: https://en.wikipedia.org/wiki/RNA
An RNA sequence is perfect for a list view example: we want to show an RNA sequence, just by displaying its nucleotids.
In the example we will display the microRNA rno-miR-21 from Rattus norvegicu, which is: 5′-UAGCUUAUCAGACUGAUGUUGA-3′.
Bring the biochemistry to C++
For the backbone of our example, we need two different classes:
clWinUINucleotide: represents a nucleotid. For the sake of simplicity its only member is the type of the nucleotide which we wrap up in an enumeration enNucleotide_Type.
clWinUIRNA: represents an RNA sequence. Since an RNA sequence is always linear and does not have branches, a vector is perfect to store the instances of clWinUINucleotide. Unfortunately, WinUI is not really good in supporting the C++ std library. Instead WinUI is supplying (I’d almost say as we’re used to from Microsoft) its own version of a vector class (yes, there may be good reasons, why std::vector can’t be used in winrt, but it is kind of annoying anyway). We will use the template class IObservableVector which you will find in the winrt::Windows::Foundation::Collections namespace. Note that this class is NOT in the Microsoft namespace as you might expect since WinUI3 is using this namespace instead of the Windows namespace which WinUI2 did. Another vector class would be IVector. But we will use IObservableVector which is more convenient to be used within a list view control. We’ll talk about that later.
App Architecture and backbone
The architecture of our app is straightforward. The base implementation has been created by the project wizard of Visual Studio 2022:

UI architecture of the app
We have an App class (and exactly one instance) which holds everything together. The app class creates an instance of the MainWindow class during startup. So, this class is a good place to store our RNA. There, you will find the member m_WinUIRNA which is an instance of clWinUIRNA. To display the RNA, MainWindow implements a user control clWinUIControl_RNAList.xaml. This is where you find the <ListView> control which will display our RNA with its nucleotides.
Further down you will see that clWinUIControl_RNAList requires access to the RNA. Therefore, MainWindow forwards a reference to the RNA to clWinUIControl_RNAList. This is being done in the XAML if MainWindow when clWinUIControl_RNAList is instantiated:
<Window
    x:Class="How2_DataTemplateSelector.MainWindow"
    xmlns="http://schemas.microsoft.com/winfx/2006/xaml/presentation"
    xmlns:x="http://schemas.microsoft.com/winfx/2006/xaml"
    xmlns:local="using:How2_DataTemplateSelector"
    xmlns:d="http://schemas.microsoft.com/expression/blend/2008"
    xmlns:mc="http://schemas.openxmlformats.org/markup-compatibility/2006"
    mc:Ignorable="d"
    Title="How2_DataTemplateSelector - Part I">

    <local:clWinUIControl_RNAList   GetWinUIRNA_Page_Property="{x:Bind  GetWinUIRNA_Window_Property}"/>
</Window>Create the app
The main focus of this how to is to how to implement data templates and data template selectors. Therefore, I won’t go too much into detail about setting up the app from the beginning. Let’s just have a quick look at the major steps.
We use the project wizard to create a blank app:
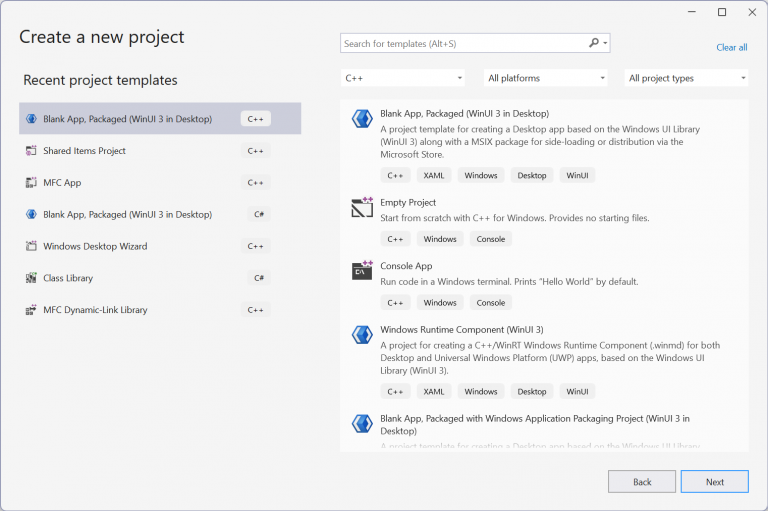
The wizard will create the backbone of the app for you:
Let’s add our two biochemistry classes to the app. We first create the idl files, then let the compiler create the .cpp and .h files (remember: you will find those in the ${ProjectDir}/GeneratedFiles/sources/).

Finally, we need a (XAML) class to display the RNA. We create a user defined control which we will implement in Mainframe.xaml. Let’s the project wizard do the main work.
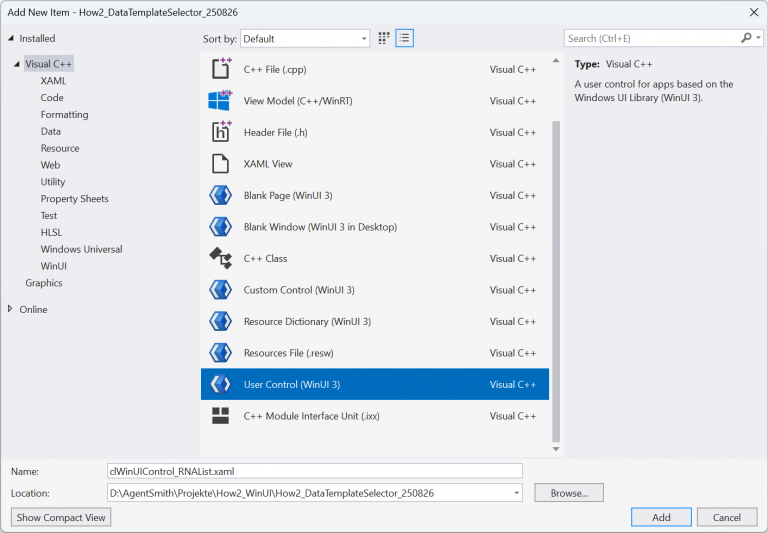
(if you look at my examples you will find that I did not use the “User Control” template but the “Blank Page” template, therefore you will find a <Page> control instead of a <UserControl>. For our example here it does not make a difference).
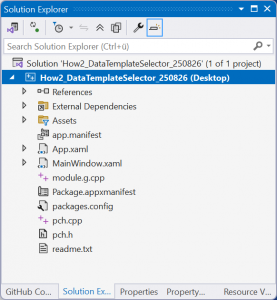
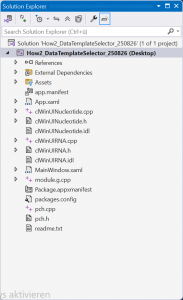
When this is done your solution explorer should have everything in place:
Implementing the user control to display the RNA
Let us implement the user control. Open the file clWinUIControl_RNAList.xaml and add the XAML sections.
In the resources section we will add a <DataTemplate> which will define the look of a single row:
<Page.Resources>
        <!--  ++++++++++++++++++++++++++++++++++++++++++++++++++++++++++++    -->
        <!--    A Nucleotide -->
        <!--  +++++++++++++++++++++++++++++++++++++++++++++++++++++++++++    -->
        <DataTemplate x:Key="resNucleotide" x:DataType="local:clWinUINucleotide">
            <Border BorderThickness="2, 2, 2, 2"
                    Background="{StaticResource CardBackgroundFillColorDefaultBrush}"
                    BorderBrush="{StaticResource    ControlElevationBorderBrush}"
                    >
                <StackPanel Orientation="Vertical"  HorizontalAlignment="Center">
                    <TextBlock Text="{x:Bind hstrSymbol_Property, Mode=OneWay}"
                        Margin="5"
                        Style="{StaticResource   TitleTextBlockStyle}"
                    />
                </StackPanel>
            </Border>

        </DataTemplate>
</Page.Resources>The <ListView> itself is rather short:
    <!--  ++++++++++++++++++++++++++++++++++++++++++++++++++++++++++++++++++    -->
    <!--    Control to show the RNA -->
    <!--  ++++++++++++++++++++++++++++++++++++++++++++++++++++++++++++++++++    -->
    <ListView   x:Name="List_RNA"
                ItemsSource="{x:Bind     GetWinUIRNA_Page_Property.Get_obsvecRNA_Property, Mode=OneWay}"
                ItemTemplate="{StaticResource resNucleotide}"
                Width="100"
    >
    </ListView>
What do we have here? We have the x:Name which does not have any function (yet). It is there for documentation purposes as well as for extensibility. Let’s skip the ItemsSource attribute for a moment and go to the ItemTemplate attribute. It tells the <ListView> control to use the template specified in the resource section with the name “resNucleotide” (which we defined before). When the program runs each <DataTemplate> will get a clWinUINucleotide-object as you can see in the x:DataType attribute when being rendered. How is this being done? Now we come to the real interesting part: the <ListView> control has an ItemsSource attribute which tells the control where to get the data from. We’re using dynamic binding with the x:Bind operation. The x:Bind statement is being followed by the name of the interface “GetWinUIRNA_Page_Property”. This is a “code behind” function in the clWinUIControl_RNAList implementation. It is declared in the .idl file:
namespace How2_DataTemplateSelector
{
    [default_interface]
    runtimeclass clWinUIControl_RNAList : Microsoft.UI.Xaml.Controls.Page
    {
        clWinUIControl_RNAList();
        clWinUIRNA  GetWinUIRNA_Page_Property;
    }
}
That function returns a clWinUIRNA object. So, using this function we have access to our RNA. That means access to the vector with the nucleotids is needed. This is exactly what the (see in the XAML above) interface “Get_obsvecRNA_Property” does. This is again a “code behind” function, now in the clWinUIRNA implementation. It is declared in the .idl file:
namespace	How2_DataTemplateSelector
{
	runtimeclass    clWinUIRNA : Microsoft.UI.Xaml.Data.INotifyPropertyChanged
	{
		clWinUIRNA();

		Windows.Foundation.Collections.IObservableVector<clWinUINucleotide>      Get_obsvecRNA_Property{ get; };

        void CreateAndAddNucleotide(Char wcSymbol);

	}
}That is why we used IObservableVector to store our nucleotides. The XAML controls can directly access such a vector which is very convenient. As a programmer you do not need any overhead to use an IObservableVector together with XAML controls. Everything which is required is in the class built in. One pitfall because it is often forgotten and ends with an exception being thrown: you need to initialize the instance of the IObservableVector class (which is valid for all classes of the observable collection classes).
//  ------------------------------------------------------------------------------
/*! \brief  Constructor for clWinUIRNA
 *  \detail
 *  \date   08/22/2025  AGS Start
 */
//  ------------------------------------------------------------------------------
    clWinUIRNA::clWinUIRNA()
    {
        // Initialize the RNA vector
        m_obsvecRNA = winrt::single_threaded_observable_vector<winrt::How2_DataTemplateSelector::clWinUINucleotide>();
    }
That’s it. Summarized, the expression ItemsSource=“{x:Bind GetWinUIRNA_Page_Property.Get_obsvecRNA_Property, Mode=OneWay}“ tells the <ListView> control that it can find a vector by calling GetWinUIRNA_Page_Property() and then Get_obsvecRNA_Property(). For each object in the vector the data template is being rendered.
The Parameter “Mode=OneWay” advises the WinUI framework to update the <ListView> control if there is a change in the vector. Very convenient, isn’t it?!
Summary
Let us summarize the major thoughts
- Each nucleotide of an RNA is represented by an instance of the clWinUINucleotide class.
- We have a class which implements the RNA itself: clWinUIRNA.
- The RNA-class has an IObservableVector which holds the nucleotides. The IObservableVector can be accessed from “outside” using the interface function Get_obsvecRNA_Property().
- The visual representation of the RNA is done in the user control clWinUIControl_RNAList.xaml. The instance of the class has a reference to the RNA class clWinUIRNA. This reference can be accessed from “outside” using the interface function GetWinUIRNA_Page_Property().
- The XAML of the user control clWinUIControl_RNAList.xaml uses the <ListView> control to display the nucleotides in a list.
- The visual representation of each nucleotide is defined in a <DataTemplate> resource in XAML.
- The <ListView> control may access the IObservableVector using dynamic binding through its ItemSource property calling the interfaces GetWinUIRNA_Page_Property() and Get_obsvecRNA_Property().
And that is our final result:
Where to go from here?
In the second part of this how to, we will implement a “data template selector”. Using a data template selector we can have individual data templates. Using such a selector each nucleotide can have its own visual representation. And we will also add an “error nucleotide” which is a representation of invalid nucleotides.